USB Data Recovery with SATA Tools
In 2003 SATA was introduced. Since then, almost all drives have had a SATA interface. Most data recovery tools are designed to connect through the SATA connector, and every step of the recovery process usually involves plugging the hard drive you are trying to recover by utilizing the SATA connector.
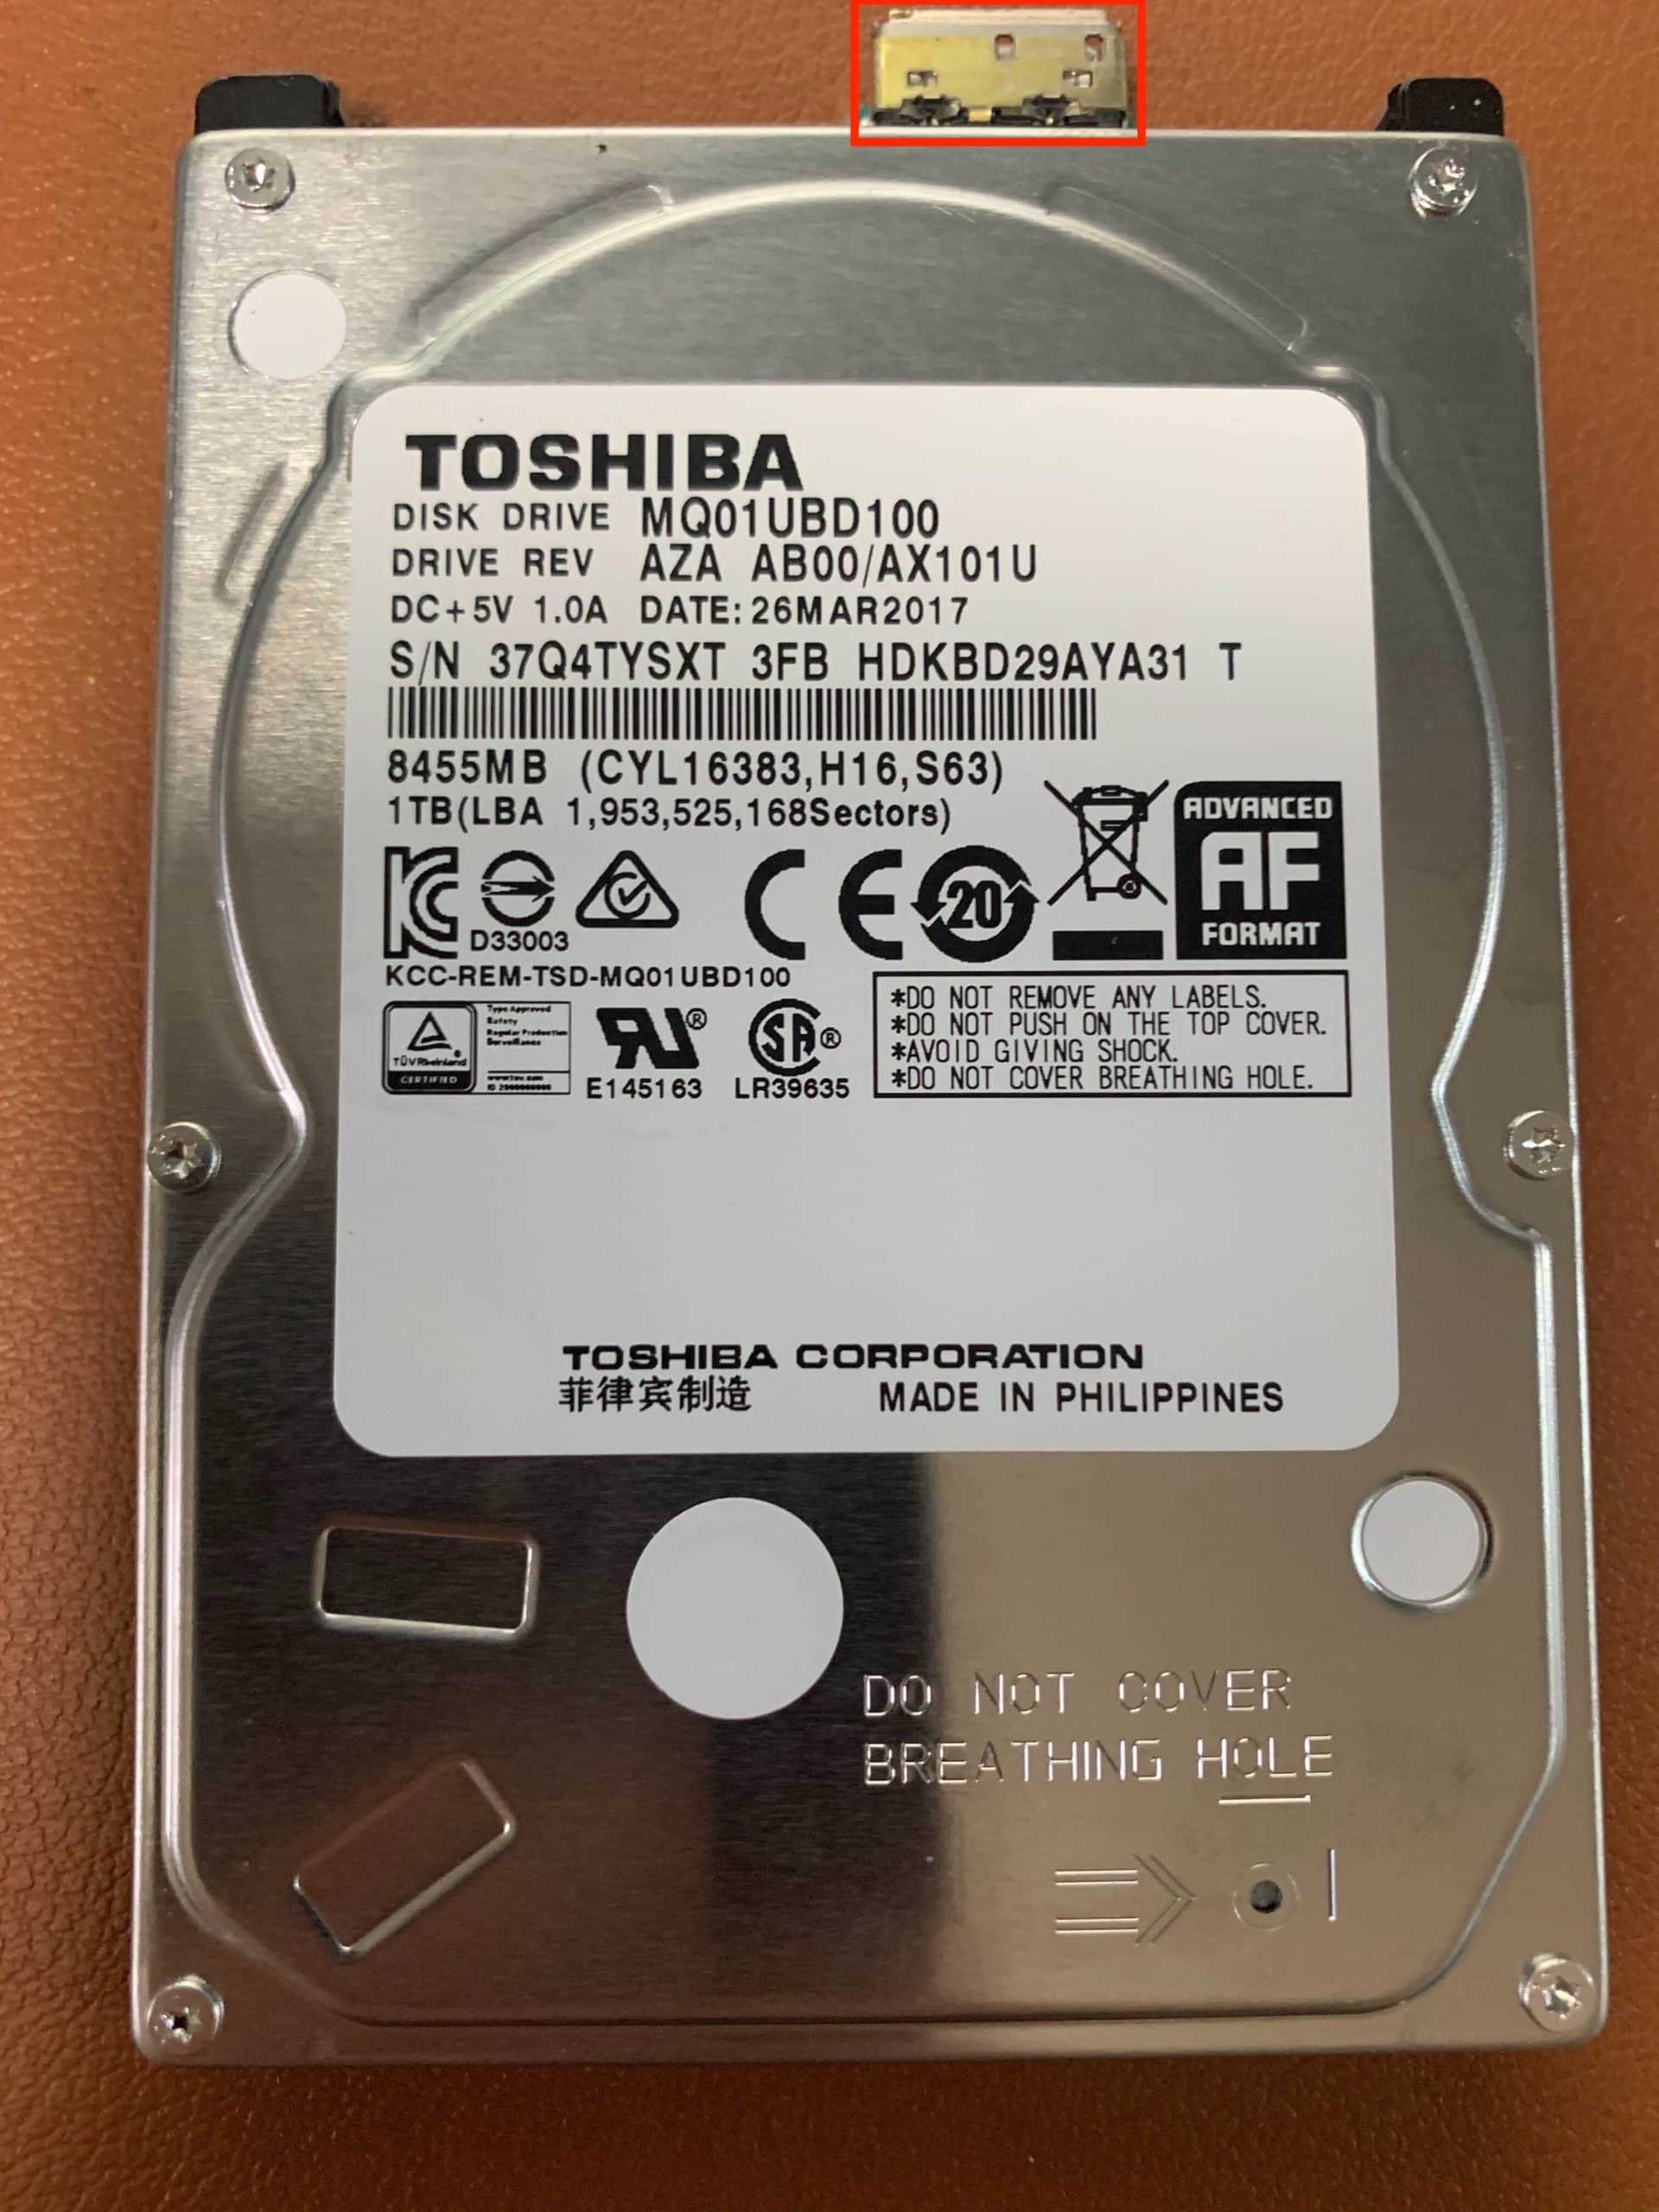
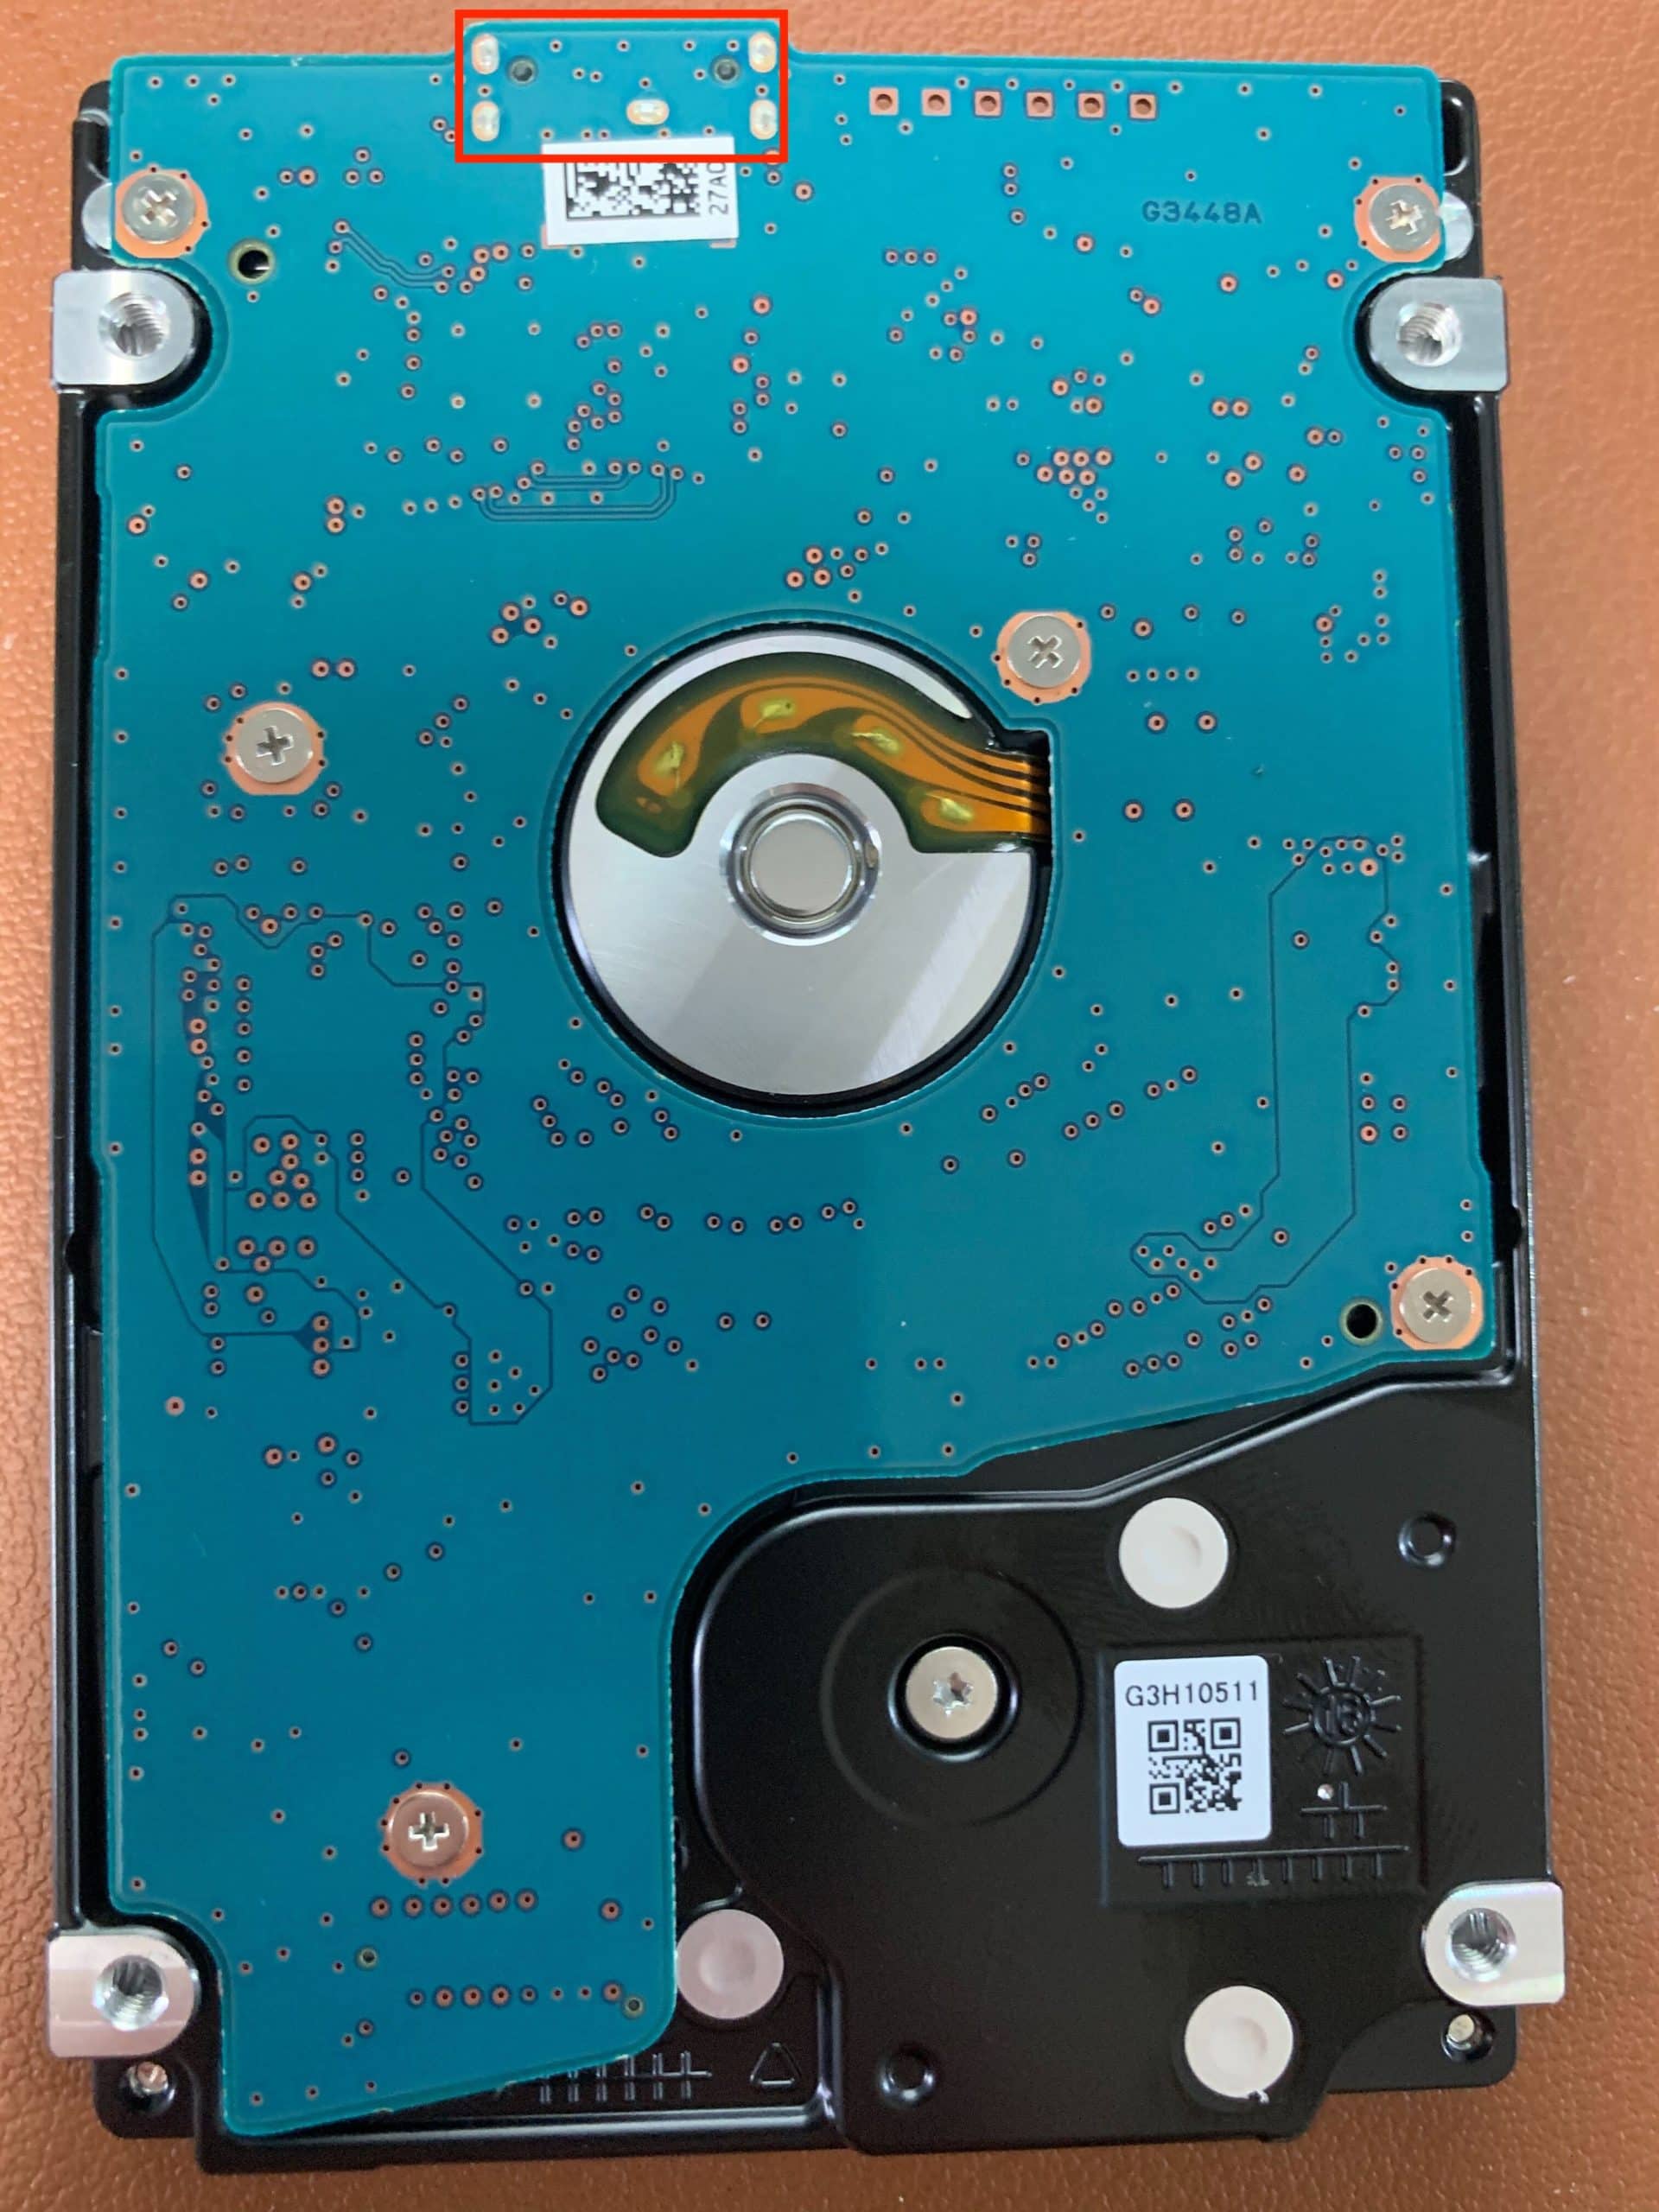
Now, quite a few of the major drive manufacturers are starting to build their hard drives with the USB port built into the drive. So instead of having an adapter in the external hard drive enclosure that adapts the SATA interface to USB, they now have a USB port built into the drive with no SATA connector present. When these USB data recovery projects come in, it is best to first swap the USB PCB for a SATA PCB, then continue with the recovery process.
Toshiba MQ01UBD100 USB Data Recovery
This Toshiba drive came in from a client who needed data from a drive that just stopped showing up on their computer. The drive arrived inside its external enclosure, and once I removed it I saw it had the USB port built into the PCB instead of a SATA connection. While the drive sounded good, it just wouldn’t show up on any of the computers it was connected to, so my hunch is that it would likely be a firmware issue with this USB data recovery project.


Data Recovery For USB Drives
There are some data recovery tools that are designed to interface with the drives through the USB port, but some of the more advanced data recovery techniques still require a SATA connection. In cases like this, one of the first steps in the data recovery process is to find a donor board that is compatible with the drive but has a SATA port on it instead of a USB port. Finding a compatible board can be difficult, but after a few years of performing these types of recoveries, I do have most of them in stock and ready for use.
The process of switching the USB board for a SATA board can be a little time-consuming, so these recoveries will fall under our affordable Standard+ fee.
Successful USB Data Recovery!
Once I had swapped out the USB PCB for a standard SATA PCB I was able to clear the firmware issues that were present on the drive. Once those firmware issues were taken care of I had full access to the data on the platters.
Next, I set up the drive for imaging by turning off all features that could interfere with the imaging process and started imaging the drive with a gentle first pass. That first pass was successful in imaging 100% of the sectors on the drive! The next step was to recover the data from those sectors using my favorite data recovery software.
On this drive, I ran both R-Studio and found that there was little to no partition corruption present. All the important data was visible with folder structure intact, and the files opened without issue. The final result of this USB data recovery was that 100% of the files were successfully recovered! The client was very pleased to have all their important data back, safe and sound.
Do you need a USB drive recovery service? I am happy to help! Just click the button below to start the recovery process or contact me with any questions.
Drive info: Toshiba MQ01UBD100, Disk REV: AZA Ab00 / AX101U, DATE: 26MAR2017, Made in Philippines
